Night Light, introduced in the Windows 10 Creators Update, reduces blue light emissions by adjusting your screen to warmer colors. This makes it easier on your eyes and can help improve sleep quality. Here’s how to turn Night Light on or off in Windows 10.
Enable or Disable Night Light in Windows 10
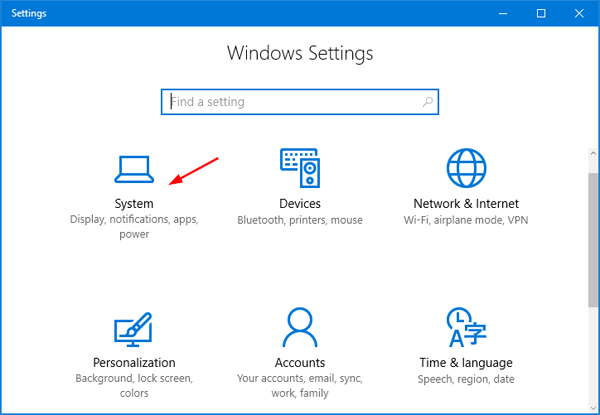
- Press the Windows + I keyboard shortcut to open the Settings app, and then click on the System icon.

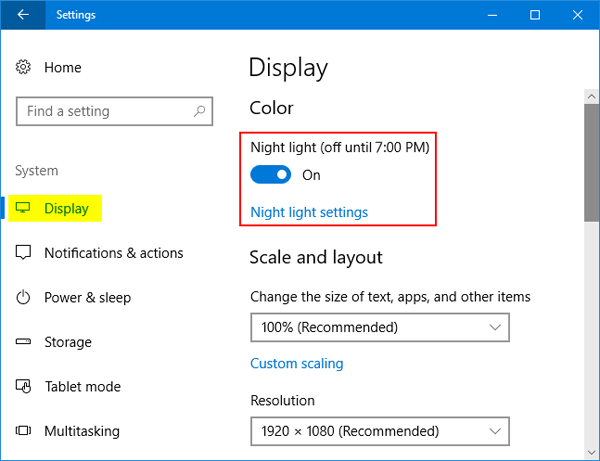
- Select the Display tab on the left side. You can then toggle the “Night light” button to On to enable it, or Off to disable it.

- If you enable the Night Light feature, you can configure it further by clicking the “Night light settings” link under the toggle.
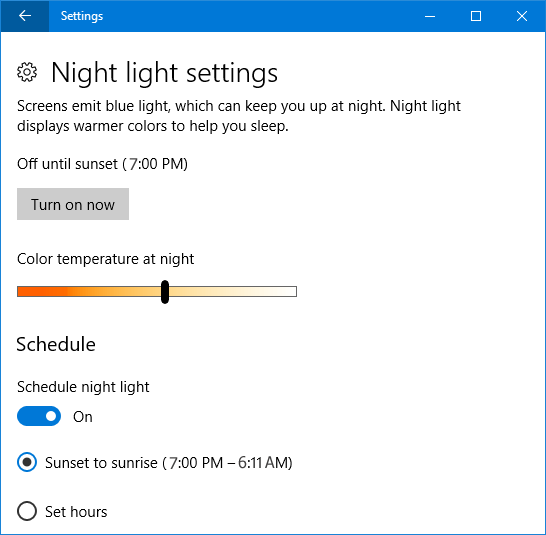
 There, you can adjust the color temperature by dragging the slider and set Night Light to activate when the sun sets, automatically disabling it at sunrise. Once configured, you can click the “Turn on now” button to immediately enable the Night Light feature.
 There, you can adjust the color temperature by dragging the slider and set Night Light to activate when the sun sets, automatically disabling it at sunrise. Once configured, you can click the “Turn on now” button to immediately enable the Night Light feature.
Fix: Night Light Option is Greyed Out
If you find that the Night Light toggle is unavailable (greyed out), follow these steps to resolve the issue:
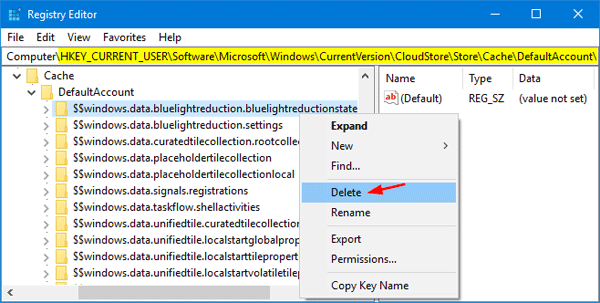
- Open the Registry Editor and navigate to the following key:
HKEY_CURRENT_USER\Software\Microsoft\Windows\CurrentVersion\CloudStore\Store\Cache\DefaultAccount
- Expand the DefaultAccount key, then right-click and delete the following two subkeys:
$$windows.data.bluelightreduction.bluelightreductionstate
 $$windows.data.bluelightreduction.settings

- When you’re done, close Registry Editor and reboot your computer. Open the Settings app and you should then be able to turn Night Light on or off.
Use CareUEyes as a More Powerful Alternative to Night Light
If Night Light is not working properly or its features feel too limited, you may want to consider a more advanced solution—CareUEyes.
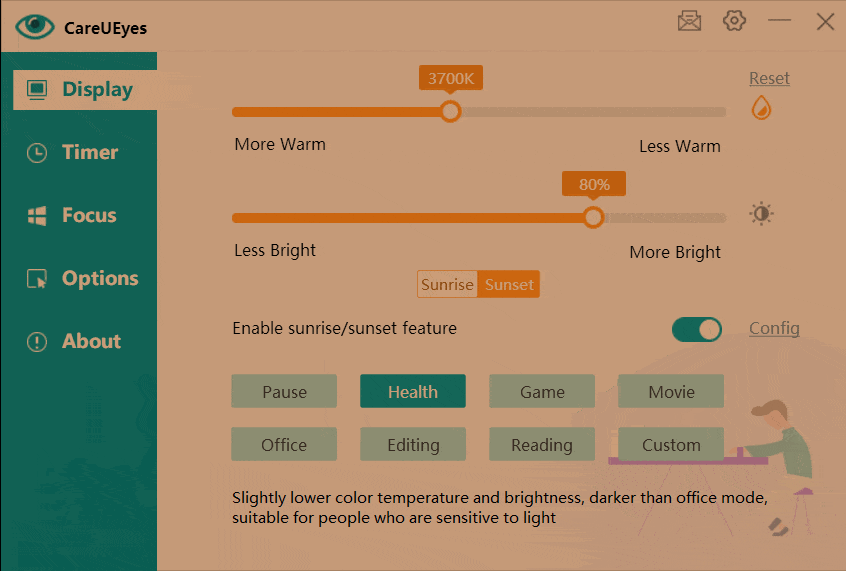
CareUEyes is a professional blue light filtering software that offers more control, better customization, and richer features compared to Windows 10’s built-in Night Light. While Night Light only lets you adjust the color temperature within a narrow range, CareUEyes gives you precise control over both color temperature and brightness, helping reduce eye strain more effectively, especially during long hours of screen use.
In addition to basic blue light filtering, CareUEyes includes:
8 preset modes tailored for different tasks like Reading, Office work, or Gaming
Auto-adjustment based on sunrise and sunset, with the option to manually set your own schedule
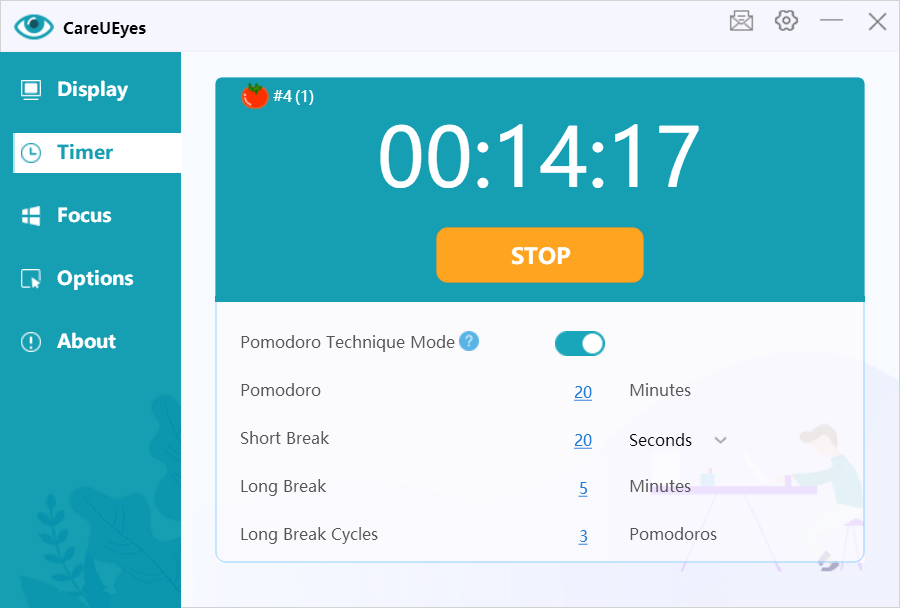
A built-in break timer to remind you to rest your eyes regularly

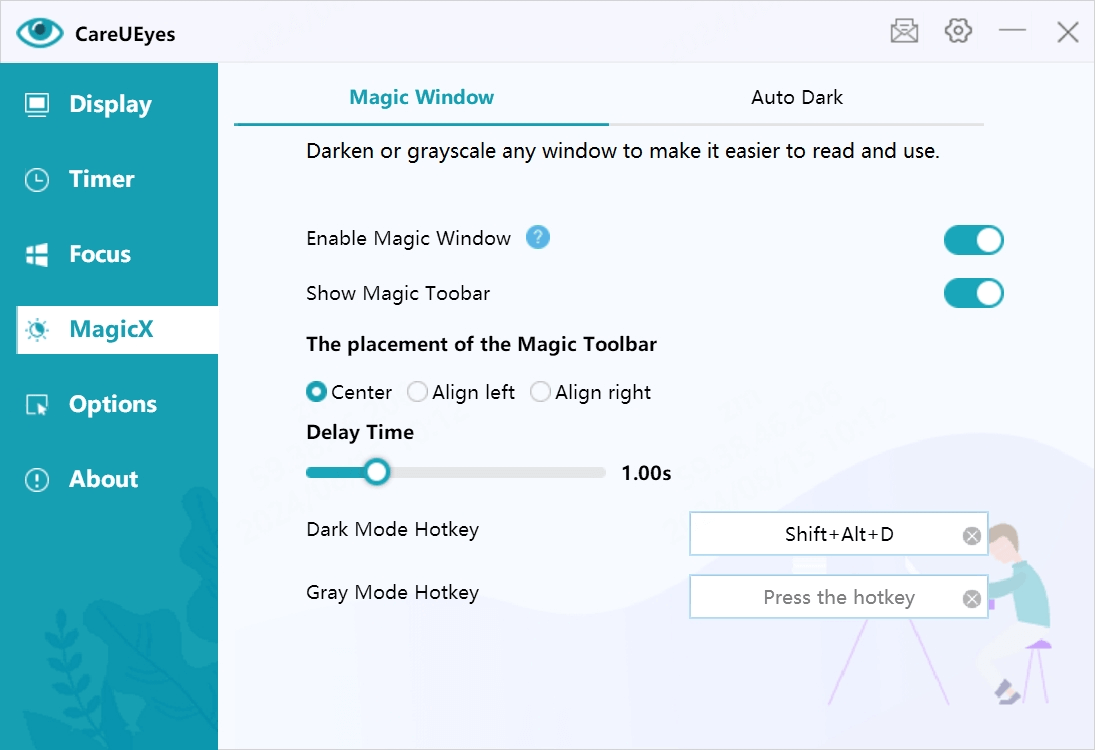
timer Focus and MagicX features that can dim or grayscale specific windows to reduce distractions

Unlike Night Light, which is only available on Windows 10 and above, CareUEyes supports Windows 7, 8, 10, and 11, making it a versatile solution for all users.
If you’re looking for a more effective way to protect your eyes and improve screen comfort, give CareUEyes a try.
Download CareUEyes now and experience a smarter alternative to Night Light.