In this article, I’ll demonstrate how to adjust the color temperature and brightness of your screen using CareUEyes.
CareUEyes features eight preset modes, making it easier for you to use. Each mode is pre-set with optimal color temperature and brightness settings. You won’t need to repeatedly adjust these settings to find suitable parameters; simply select one of the preset modes that suits your needs.
CareUEyes filters blue light by adjusting the color temperature—lower temperatures mean less blue light.
The difference between the eight preset modes
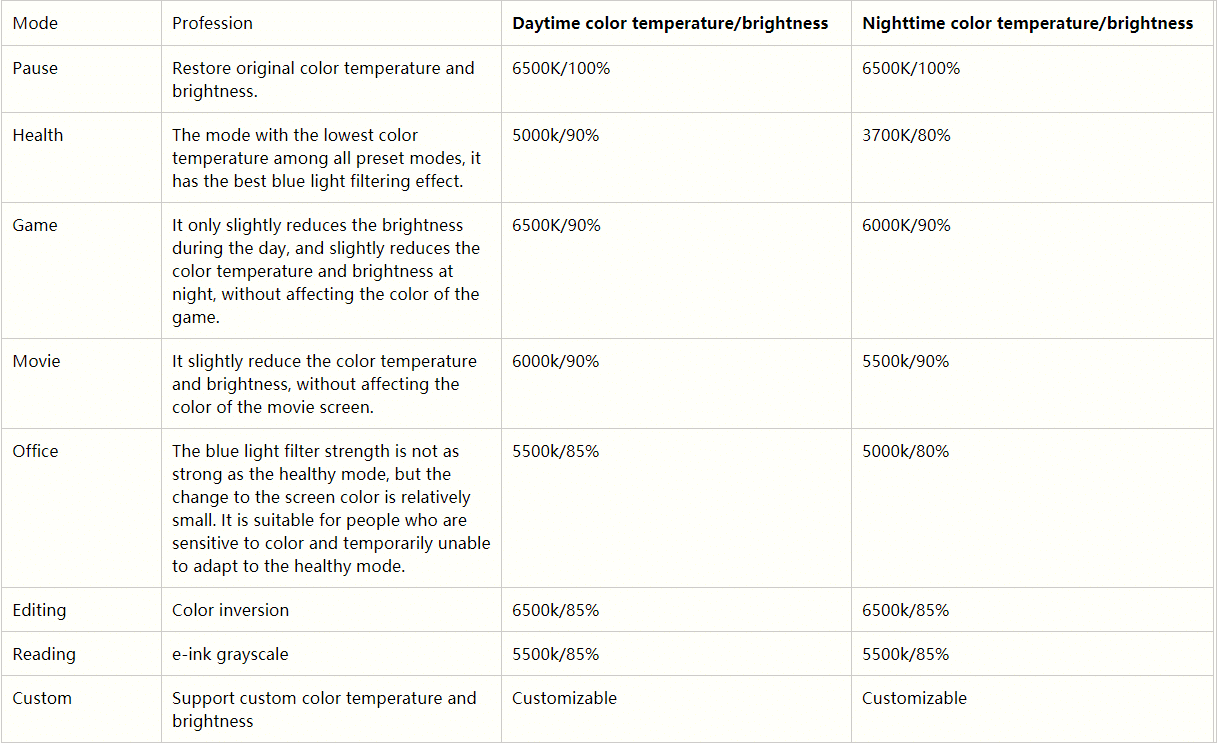
Pause Mode: If you’re working on tasks that demand precise color accuracy, such as editing photos in Photoshop, you can select Pause mode.
Health Mode: As the default mode for all users, Health mode effectively filters blue light, reduces screen brightness, and provides optimal comfort for the eyes. If you’re unsure which mode to choose, start with Health mode.
Game Mode: Given the high color requirements in gaming, Game mode minimally alters game colors while only adjusting screen brightness. This subtle adjustment enhances eye comfort during gameplay.
Movie Mode: Movies also require accurate color representation, so Movie mode slightly adjusts color temperature and brightness without compromising the movie’s color accuracy.
Office Mode: For new CareUEyes users struggling to adjust to color changes in Health mode, it’s recommended to start with Office mode. Once accustomed, transitioning to Health mode is advised for more effective blue light filtering and eye protection.
Editing Mode: Editing mode inverts screen colors, ideal for editing documents in Word or Excel and for coding. With white backgrounds transformed into black after inversion, most blue light is reduced. CareUEyes’ editing mode offers a more comfortable dark gray background compared to other software, minimizing eye strain caused by stark contrasts.
One drawback of editing mode is potential color distortion in images, though this is generally not a concern when editing text.
Reading Mode: Reading mode converts screen colors to black and white, simulating an e-ink device, making it ideal for reading text.
Custom Mode: If none of the above modes suit your needs, Custom mode allows you to customize color temperature and brightness.
How to Adjust Preset Color Temperature and Brightness:
Except for Pause mode, other modes allow manual adjustment of preset color temperature and brightness.
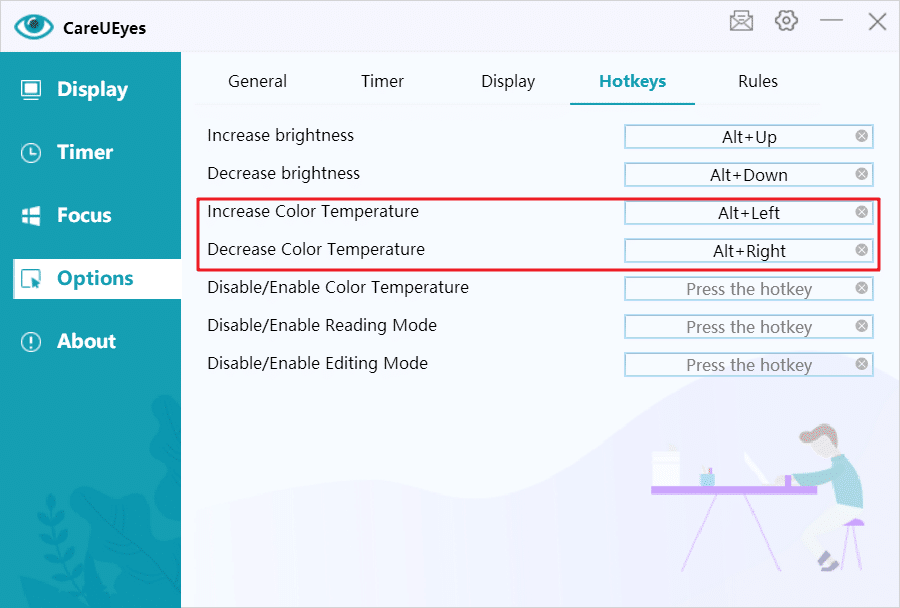
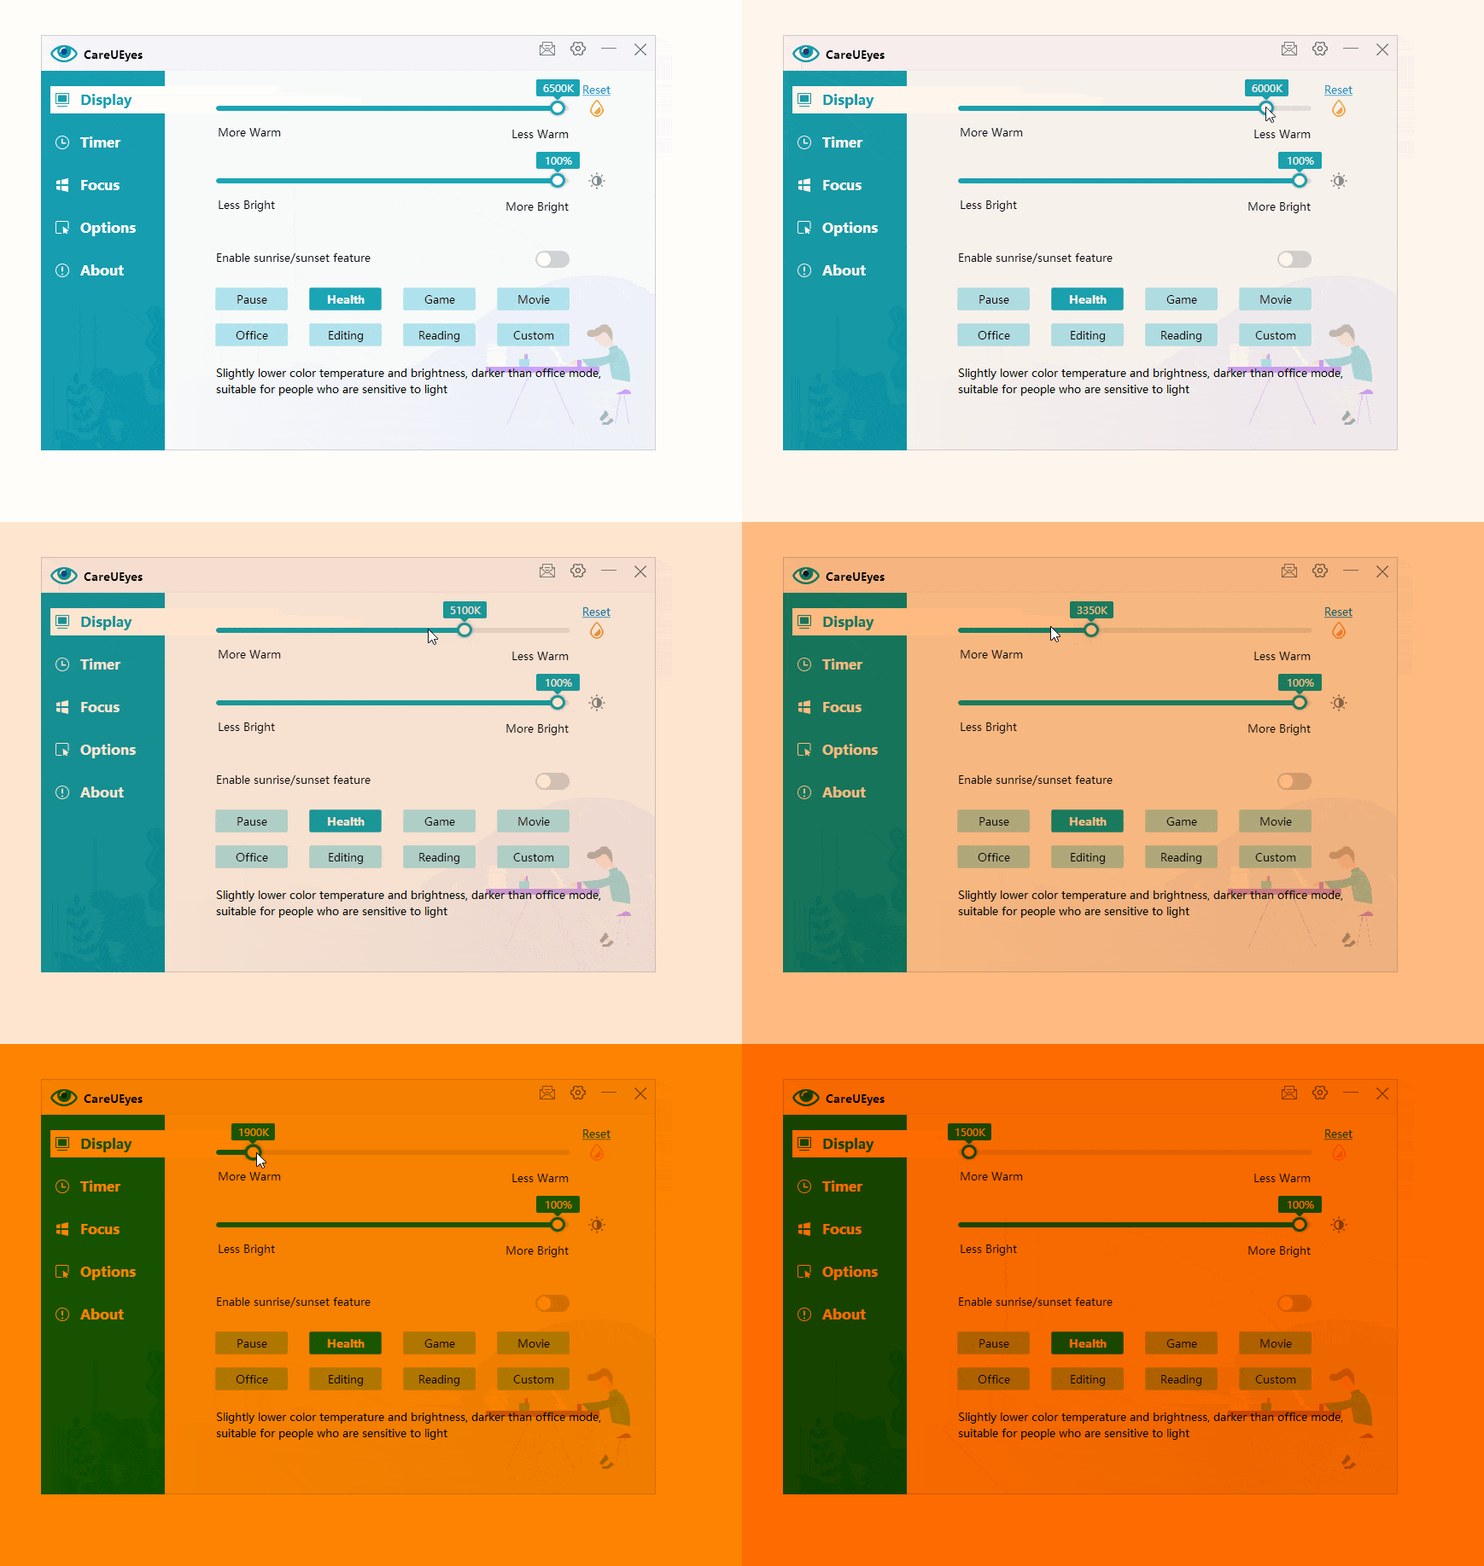
Adjusting Color Temperature: First Method: Drag or click the color temperature slider left to decrease color temperature, and right to increase it. Lower color temperatures emit less blue light from the screen.
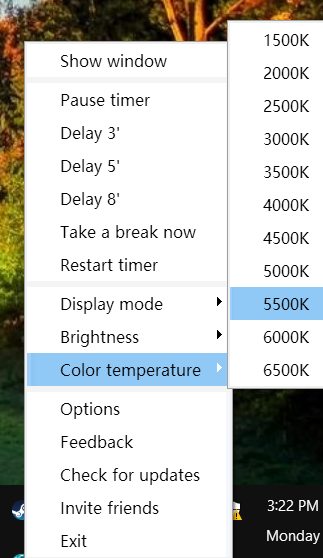
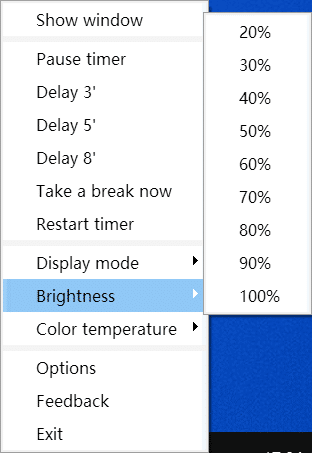
The third method entails selecting the color temperature value from the tray’s right-click menu.
Adjusting Brightness:
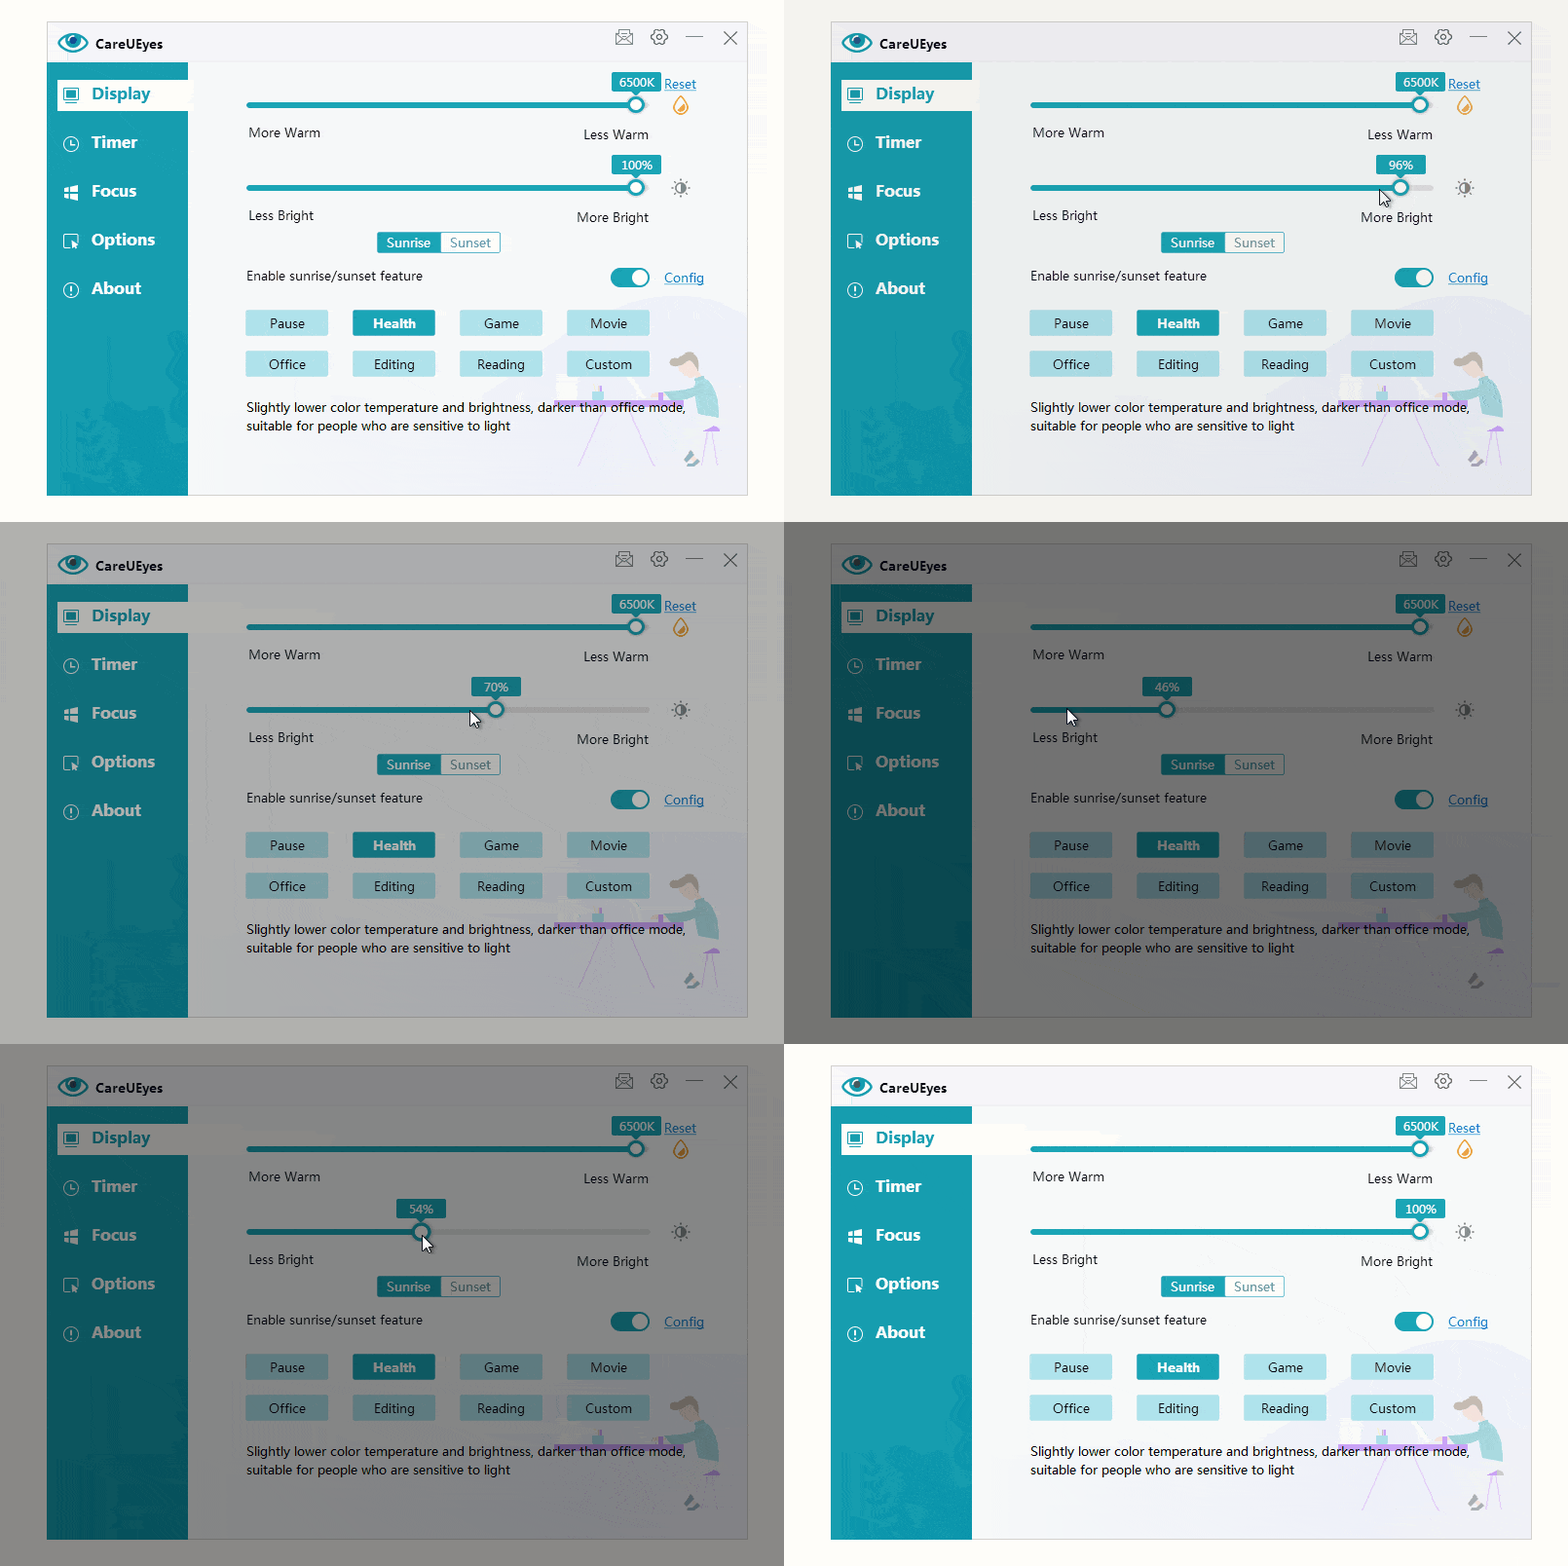
The primary method involves dragging or clicking the brightness slider left to decrease brightness, and right to increase it.
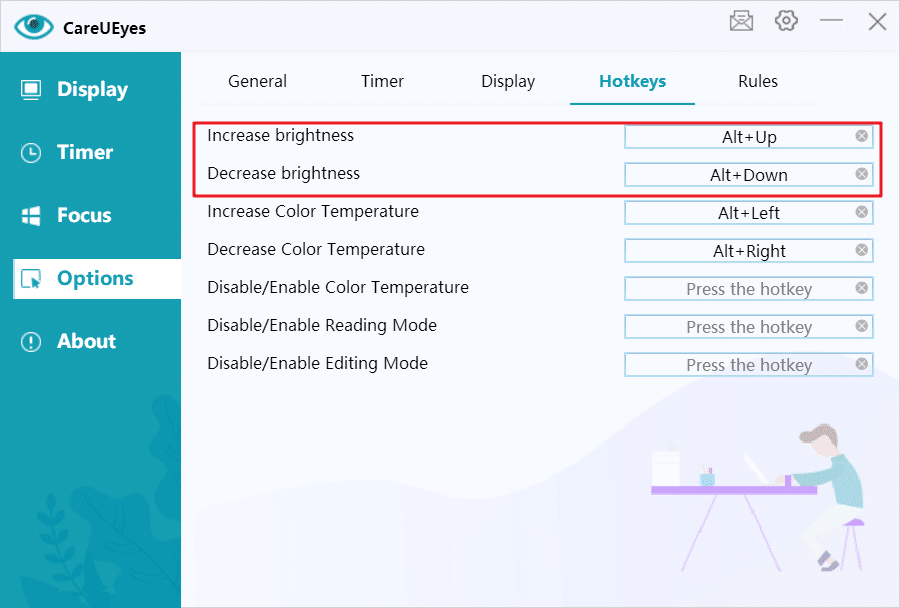
The second method involves setting hotkeys to swiftly adjust brightness.
The third method entails selecting the brightness value from the tray’s right-click menu.
How to Restore Default Parameters:
Click the Reset button to revert the color temperature and brightness of the current mode to their default settings.

How to Activate Sunrise/Sunset Mode:
- Toggle the switch for sunrise/sunset mode.

2.Click the “Config” button to access the sunrise/sunset settings page.

3.Setting the Sunrise/Sunset Time:
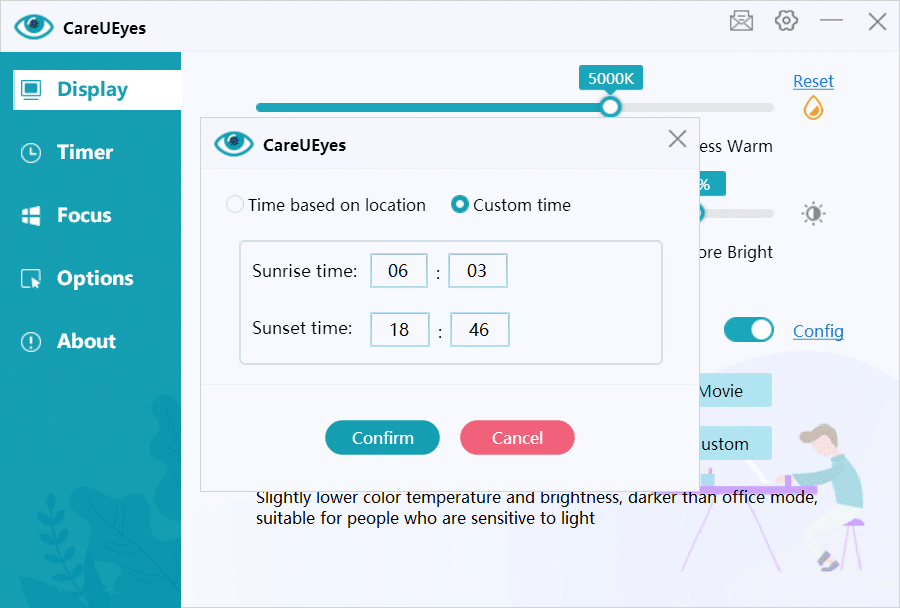
There are two methods for setting the sunrise/sunset time.
The first method is based on geographical location. The program first needs to retrieve the user’s current address location and then automatically calculate the sunrise/sunset time based on that geographical location.

The second option is to customize the sunrise/sunset time. You can adjust the sunrise/sunset time in the edit box and then click the OK button to save the setting.
